
HOW TO MAKE A PIPED FABRIC HEADBOARD
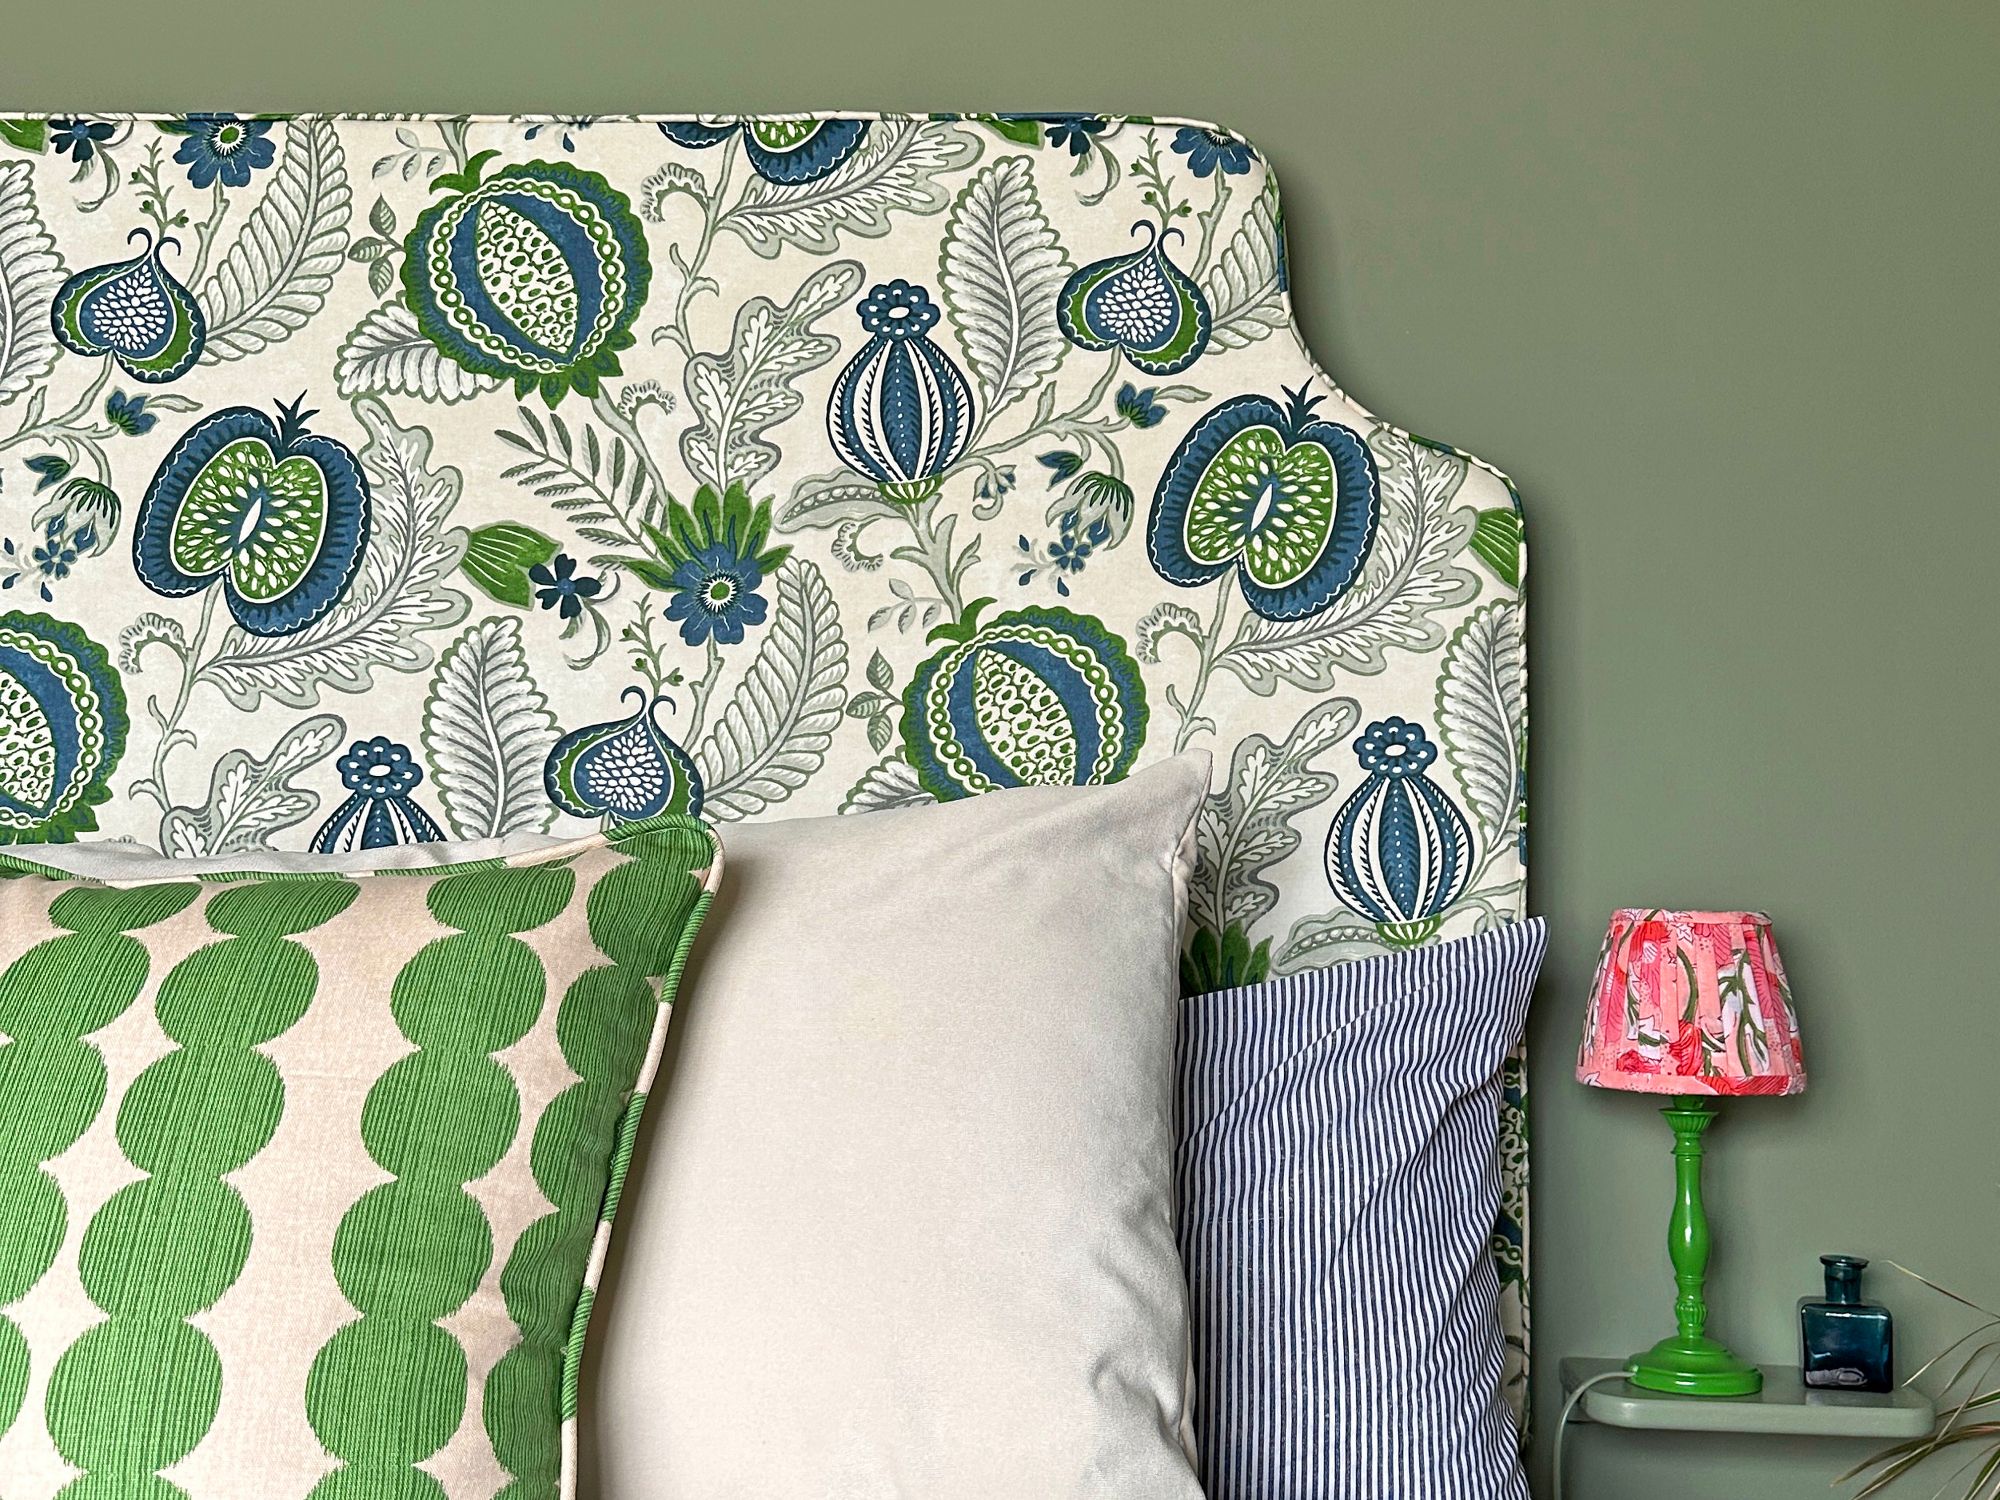
I couldn't wait to inject some print and pattern into our new bedroom and when I saw this bold fabric, I knew I had to make a statement headboard. I wanted it to be oversized for a big impact and to make sure the pattern was a focal point. I decided to add piping for a more premium look and I am so happy with how it turned out.
Full disclosure, my mother in law helped with the whole process because I wanted to learn how to do it myself and write a blog post to help others do the same!
In this post, I'm going to list out the steps to create the fabric headboard along with everything you will need to recreate it yourself.
What you will need: (Click for links)
18mm MDF
Pencil
Jigsaw
Mug or round object, depending on the shape you wish to create
Fire retardant upholstery foam*
Knife to cut foam
Scissors or rotary cutter*
Fabric suitable for upholstery (fire retardant)
Scotchguard (optional to protect the fabric)*
Sewing machine with zipper foot
Step one: I started by deciding on the height and width for the headboard. Our bed is a double and the standard size for a headboard is around 60cm (from the top of the mattress). I wanted it to be oversized so I chose to cut it to 138cm wide (2cm wider than the mattress) and 90cm tall. *Note that once made, it may be a little larger than the initial size. We cut the MDF to these measurements, then I drew onto a corner to decide on the shape. I freehanded the curve, then used a mug to smooth off the corners.

Step two: Cut out the shape with a jigsaw. I found it easier to cut the main curve, then to cut the smaller rounded curves afterwards. I then used the cut off piece to make a template for the other side. To do this, flip it over and draw around it on the opposite corner. You have an replica of the shape to cut out.

Step three: Once you have your MDF headboard shape cut out, it's time to add the foam. You can buy foam cut to size, but it's quite expensive and I found this* from Dunelm, so I bought two and butted them up against each other onto the MDF. I stuck both pieces using permanent spray adhesive. Alternatively, this* supplier sells various widths and thicknesses by the metre. To get a smooth shape around the edges of the headboard, I chose to buy foam slightly bigger than the MDF so I could leave a 1cm overhang. I cut it down with a kitchen knife; don't worry too much if it's rough, the fabric should be forgiving. You can add wadding* to make the corners rounded, but I wanted a more square shape so chose to go without.


Step four: The next step is to stitch the fabric cover.
If you want to make the process easier, you can for-go the piping and just pull the fabric around the edges of the MDF and staple it in place. I wanted to add piping, so the process is a little more complex.
First, we cut the main section of the headboard fabric. At the top and sides, this needs to be exactly the same shape as the MDF, with an extra 1cm added for the seam allowance. Make sure you leave a good amount of fabric at the bottom to wrap around the bottom of the MDF.


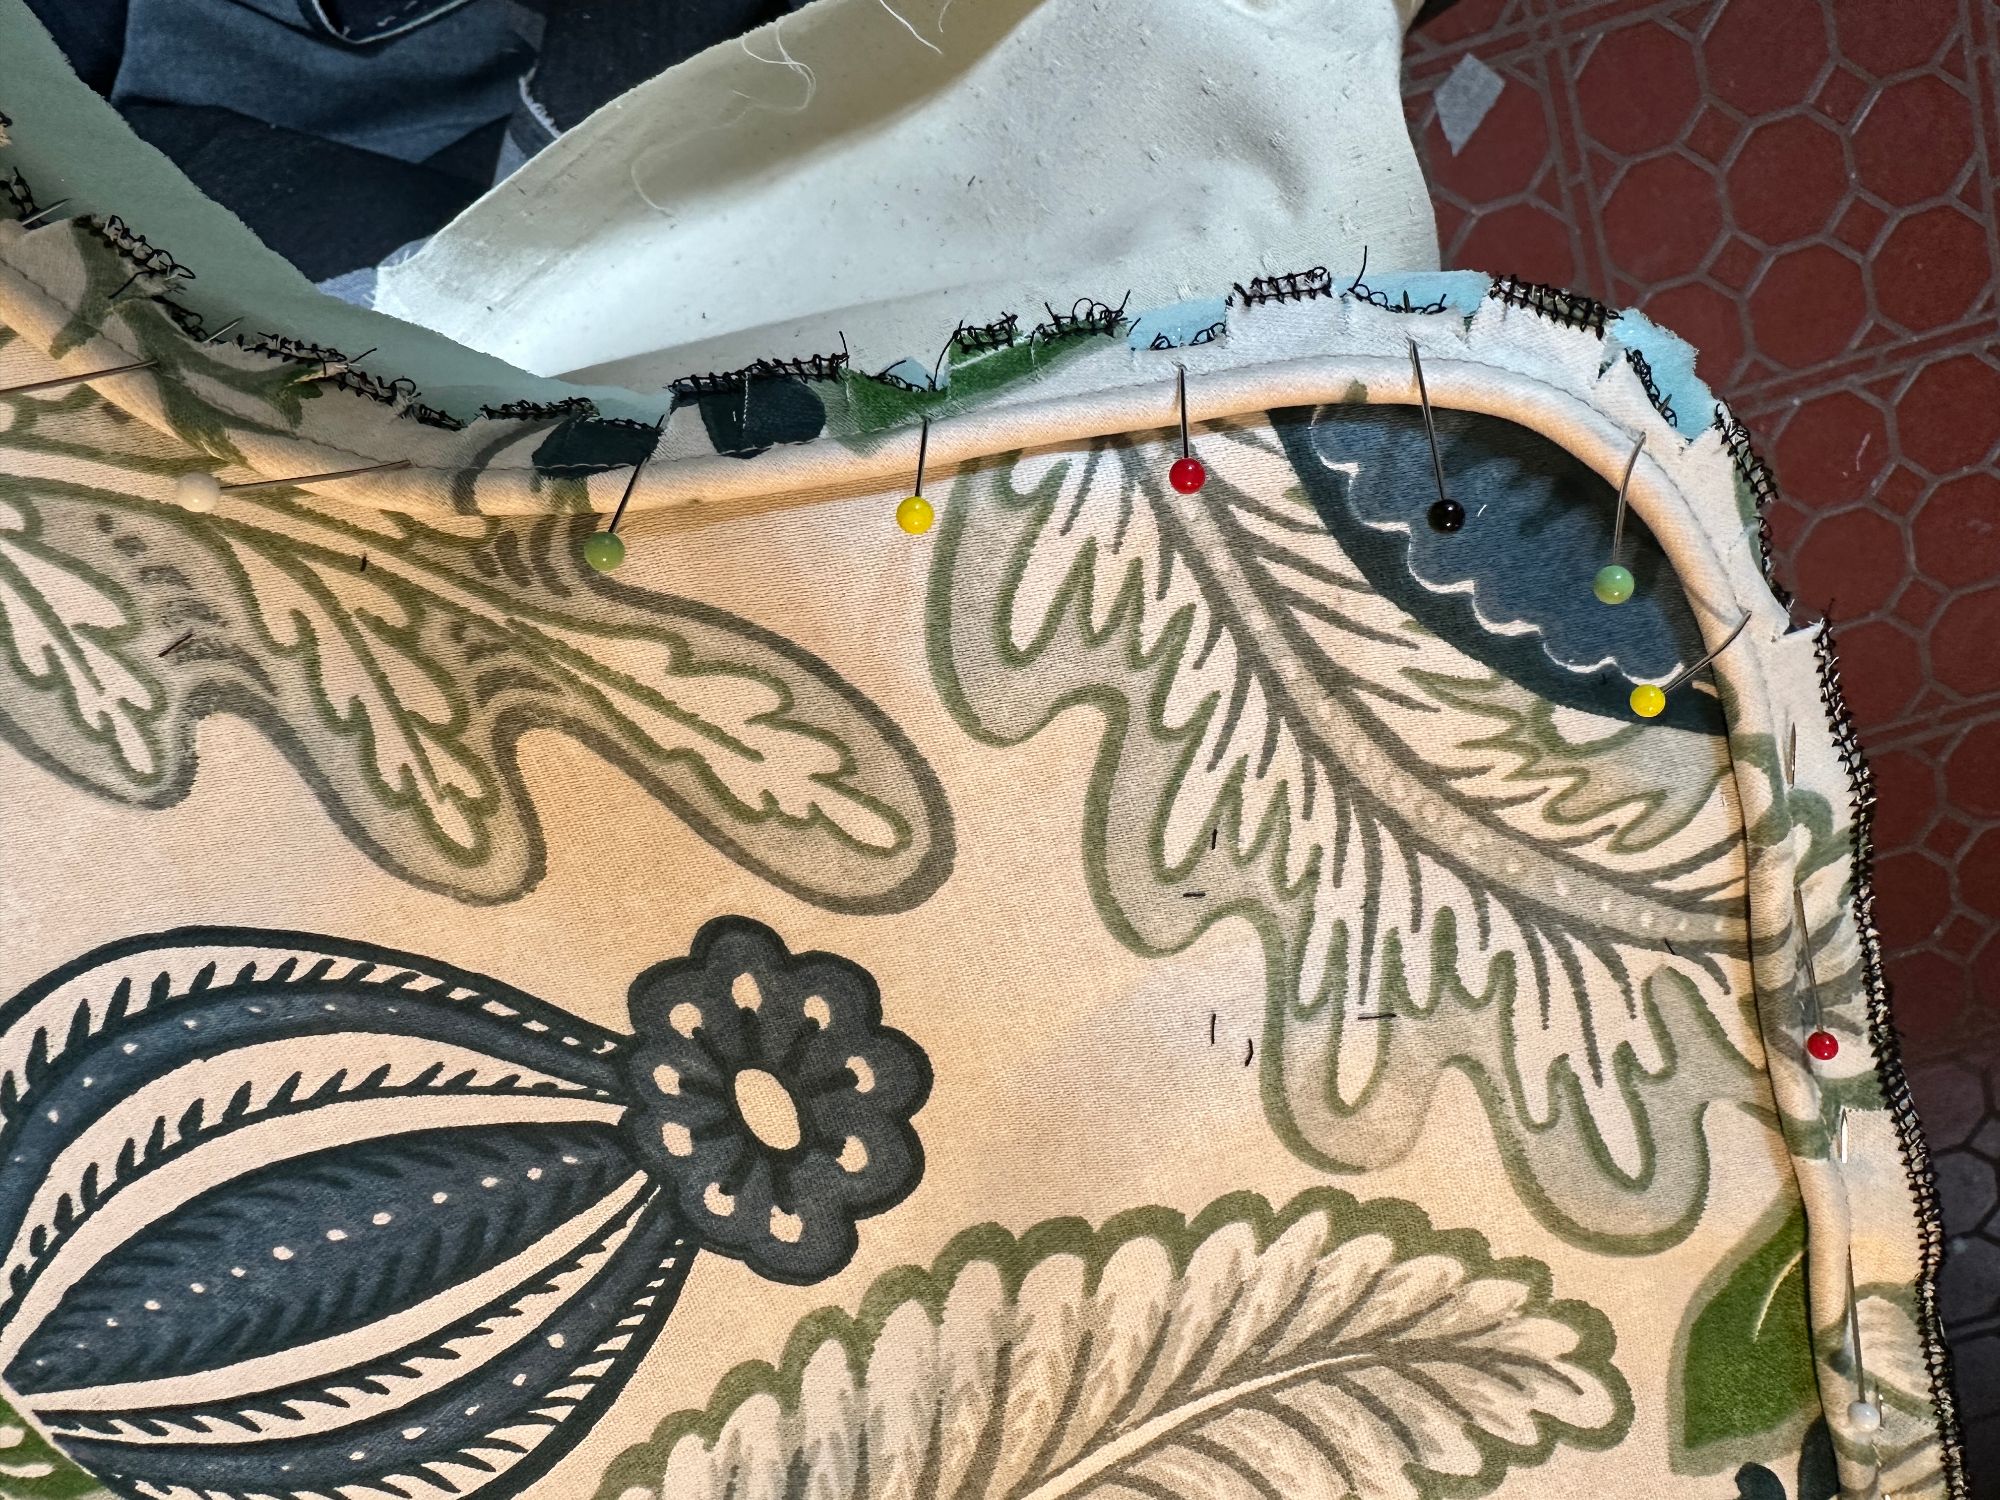
Step five: Next up is making the piping trim. You will need strips of fabric and piping cord*. Cutting the fabric on the bias (diagonally) will make it a lot easier to handle and curve it around corners. Your piping will need to be long as it needs to be stitched around the entire headboard, so you may need to cut some long strips and stitch these together. To make the piping, you need to wrap the fabric strip around the piping cord and stitch in place using a zipper foot, to enclose the piping cord in the fabric. For a detailed video on this, click here.


Step six: The piping should look similar to above. (We overlocked it but you don't need to do this). Pin the piping to the right side of the main fabric piece, with the piping facing inwards. Stitch together, with a 1cm seam allowance, getting as close to the edge of the piping cord as possible.
Once stitched, make small cuts around the edge of the piping trim and pull around the edge of the foam to make sure it sits on the edge neatly.
Step seven: The last piece of fabric to cut is a strip wide enough to cover the sides of the headboard and stretch around the back. This will finish off the cover and allow enough fabric to staple to the back of the MDF. We cut a strip measuring 15cm wide, and 2.5m long, as this needs to be sewn around the entire headboard. We stitched two pieces together to create one long piece and placed it so the seam was on the side of the bed you are least likely to see. This piece needs to be sewn face down, on top of the piping, and the stitch should be close to the outside piping edge.

Once sewed together, it should look like this:

I've drawn the below diagram to show the pieces and how they are stitched together.

Step eight: You should now have 'sides' to your cover, and a good amount of fabric to pull around to the back of the headboard to staple it all in place. Work on opposite edges, starting at the top to ensure the piping is sitting correctly. Make sure it's pulled tightly. For the corners, you may need to make cuts and create neat folds at the back to avoid creases on the sides.


Step nine: To finish the bottom corner neatly, we made some folds and stapled in place.

Step ten: Fix to the wall and enjoy your new headboard! I gave it a coat of Scotchguard* to protect it, but this is optional. We fitted it using a split batten method, shown here. Please take note of the weight of the headboard and make sure you use an appropriate method and fixtures for the type of wall you are fixing to.

AD - The fabric in this post was part of an Instagram collaboration with Just Fabrics.
*This post contains affiliate links, meaning if you place an order, I may earn a few pennies.
Comments